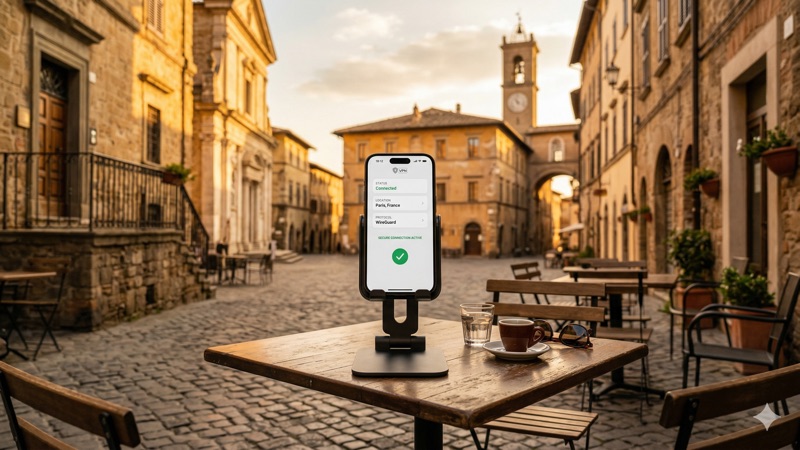
How to Check If Your VPN Is Actually Working
You’ve just installed a VPN, connected to a server in another country, and now you see a little green icon telling you everything is fine. But how do you actually know your real IP address and location are hidden? How do you test if your VPN is working the way it should? The truth is, a VPN connection can appear active while still leaking your personal data through cracks you didn’t know existed. In this guide, we’ll walk you through the exact steps to verify your VPN is doing its job — using free, easy-to-use tools that anyone can access.
Whether you’re using a VPN for privacy, to access region-locked content, or to stay safe on public Wi-Fi, a leaking VPN defeats the entire purpose. The good news is that checking takes just a few minutes, and you don’t need any technical expertise to do it.
Why You Need to Test If Your VPN Is Working
It might seem like a VPN either works or it doesn’t. But the reality is more nuanced. A VPN can successfully encrypt your traffic while still exposing your true IP address through a DNS leak. Or your browser might bypass the VPN tunnel entirely through something called a WebRTC leak.
These leaks happen silently. You won’t get an error message or a warning notification. Your VPN app will still show “Connected,” and you’ll still be able to browse the internet. But websites, your internet service provider (ISP), and potentially anyone monitoring the network could still see who you are and where you’re connecting from.
That’s why regularly testing your VPN connection isn’t just good practice — it’s essential. Think of it like checking your seatbelt actually clicks into place before driving. The dashboard light might say you’re buckled in, but a quick tug confirms it.
Common Reasons a VPN Might Not Be Working Properly
- DNS leaks: Your device sends website address requests (DNS queries) outside the encrypted VPN tunnel, revealing the sites you visit to your ISP.
- WebRTC leaks: A browser feature designed for real-time communication (like video calls) can expose your real IP address even when a VPN is active.
- IP address leaks: The VPN connection drops momentarily, and your device reconnects using your real IP address without you noticing.
- IPv6 leaks: Your VPN only handles IPv4 traffic (the older internet address format), while your device also communicates over IPv6 (the newer format), bypassing the VPN entirely.
- Misconfigured kill switch: The feature designed to block internet access when the VPN drops isn’t enabled or isn’t working correctly.
- Split tunneling settings: You may have accidentally configured certain apps or browsers to bypass the VPN.
Step 1: Check Your IP Address Before and After Connecting to the VPN
The most fundamental way to test your VPN connection is to compare your IP address before and after you turn the VPN on. Your IP address is a unique number assigned to your device by your internet provider. It reveals your approximate location and identifies your connection. When a VPN is working correctly, websites should see the VPN server’s IP address instead of yours.
How to Perform a Basic VPN IP Leak Test
Here’s how to do it step by step:
Before connecting to your VPN:
- Open your web browser and go to ipleak.net. This is a free, widely trusted tool that shows your current IP address, location, and more.
- Write down or take a screenshot of the IP address displayed. Note the country and city shown.
- This is your real IP address — the one your ISP assigned to you.
After connecting to your VPN:
- Turn on your VPN and connect to a server. Choose a server in a different country from your actual location to make the difference obvious.
- Wait a few seconds for the connection to fully establish.
- Go back to ipleak.net (or refresh the page if it’s still open).
- Check the IP address now. It should be completely different from the one you noted earlier, and the location should match the VPN server you selected.
You can also use alternative tools like whatismyipaddress.com or simply search “what is my IP” in Google. However, ipleak.net is particularly useful because it checks for multiple types of leaks on a single page, which we’ll cover next.
Step 2: Run a DNS Leak Test to Verify Full Protection
Even if your IP address changes correctly, your VPN might still be leaking information through DNS requests. To understand why this matters, let’s quickly explain what DNS is.
What Is DNS and Why Does It Matter?
DNS stands for Domain Name System. It’s essentially the internet’s phone book. When you type “example.com” into your browser, your device sends a DNS request to a server that translates that domain name into a numerical IP address so your browser knows where to go. Normally, these requests go to your ISP’s DNS servers.
When you use a VPN, your DNS requests should be routed through the VPN’s own DNS servers. If they’re not — if they still go to your ISP or a third-party DNS provider — that’s called a DNS leak. It means your ISP (or anyone else monitoring those DNS servers) can see every website you visit, even though the rest of your traffic is encrypted.
How to Perform a DNS Leak Test
There are two excellent free tools for this:
Option 1: ipleak.net
- While connected to your VPN, visit ipleak.net.
- Scroll down to the section labeled “DNS Addresses.”
- You’ll see a list of DNS servers your device is currently using.
- If the DNS servers shown belong to your ISP or are located in your real country (and you’re connected to a VPN server elsewhere), you have a DNS leak.
- If the DNS servers belong to your VPN provider or are in the same country as your VPN server, you’re in good shape.
Option 2: dnsleaktest.com
- While connected to your VPN, go to dnsleaktest.com.
- Click “Extended test” for the most thorough results. The standard test is quicker but may miss intermittent leaks.
- Wait for the test to complete (it takes about 30 seconds).
- Review the list of DNS servers. Again, they should belong to your VPN provider or be located in the same region as your VPN server, not your actual ISP.
If you discover a DNS leak, most quality VPN providers include a DNS leak protection setting in their app. Look for it in the settings or preferences menu and make sure it’s turned on. Providers like NordVPN, ExpressVPN, and Surfshark all route DNS requests through their own servers by default, but it’s still worth verifying.
Step 3: Perform a WebRTC Leak Test
WebRTC (Web Real-Time Communication) is a technology built into most modern browsers, including Chrome, Firefox, Edge, and Opera. It enables direct browser-to-browser communication for features like video calls, voice chat, and file sharing without needing a plugin.
The problem? WebRTC can reveal your real IP address — including your local network IP and your public IP — even when you’re connected to a VPN. This happens because WebRTC uses a protocol called STUN that can bypass the VPN tunnel to discover your true IP address.
How to Check for WebRTC Leaks
This is easier than it sounds:
- Connect to your VPN.
- Visit ipleak.net and look at the “WebRTC Detection” section near the top of the page.
- Alternatively, visit browserleaks.com/webrtc for a dedicated WebRTC leak test with more detailed results.
- If either tool shows your real IP address (the one you noted before connecting to the VPN), you have a WebRTC leak.
How to Fix WebRTC Leaks
The fix depends on your browser:
- Firefox: Type
about:configin the address bar, search formedia.peerconnection.enabled, and set it tofalse. This disables WebRTC entirely. - Chrome: Chrome doesn’t offer a built-in way to disable WebRTC, but you can install a browser extension like “WebRTC Leak Prevent” or “uBlock Origin” (which has a WebRTC leak prevention option in its settings).
- Edge: Similar to Chrome, you’ll need an extension. Microsoft Edge also has a flag at
edge://flagswhere you can search for WebRTC-related settings. - Safari: Safari handles WebRTC more restrictively by default and is less prone to these leaks, but you can disable it under Develop > Experimental Features if needed.
Many premium VPN apps now include built-in WebRTC leak protection. NordVPN’s browser extensions, for example, block WebRTC leaks automatically. Surfshark’s browser extension does the same. Check whether your VPN provider offers a browser extension with this feature.
Step 4: Test for IPv6 Leaks
The internet is gradually transitioning from IPv4 addresses (like 192.168.1.1) to IPv6 addresses (like 2001:0db8:85a3:0000:0000:8a2e:0370:7334). Many devices now support both. The issue is that some VPNs only tunnel IPv4 traffic, leaving IPv6 traffic unprotected and potentially exposing your real IPv6 address.
How to Check for IPv6 Leaks
- Connect to your VPN.
- Visit ipleak.net — it displays both your IPv4 and IPv6 addresses if detected.
- You can also visit ipv6leak.com for a dedicated test.
- If your real IPv6 address is visible while your IPv4 address shows the VPN server’s address, you have an IPv6 leak.
Most reputable VPN providers in 2026 handle IPv6 in one of two ways: they either tunnel IPv6 traffic through the VPN alongside IPv4, or they block IPv6 traffic entirely while the VPN is active. Both approaches prevent leaks. Check your VPN app’s settings for an “IPv6 leak protection” toggle and make sure it’s enabled.
Step 5: Verify Your VPN Kill Switch Is Working
A kill switch is a VPN feature that blocks all internet traffic if the VPN connection drops unexpectedly. Without it, your device would automatically reconnect to the internet using your real IP address, potentially exposing your activity before the VPN reconnects.
How to Test Your Kill Switch
This test is slightly more hands-on, but it’s important:
- Connect to your VPN and open ipleak.net in your browser. Confirm it shows the VPN server’s IP address.
- Now, without disconnecting the VPN through the app, try to simulate a connection drop. You can do this by temporarily disabling your Wi-Fi adapter for 2-3 seconds, then re-enabling it.
- Immediately refresh ipleak.net once your internet reconnects.
- If the kill switch is working properly, either the page won’t load at all (because the kill switch blocked internet access while the VPN was reconnecting) or it will show the VPN’s IP address once the connection re-establishes.
- If you briefly see your real IP address, the kill switch either isn’t enabled or isn’t functioning correctly.
To enable the kill switch, open your VPN app’s settings and look for “Kill Switch,” “Network Lock” (ExpressVPN’s term), or “Internet Kill Switch.” On NordVPN, you’ll find it in the settings menu with options for both an app-level and system-wide kill switch. Surfshark also includes a kill switch that you can toggle on in its settings.
The Best Free Tools to Test If Your VPN Is Working
Here’s a quick summary of the free tools mentioned throughout this guide, along with what each one tests:
- ipleak.net — An all-in-one tool that checks your IP address, DNS servers, WebRTC leaks, and IPv6 leaks on a single page. This is the best starting point for most people.
- dnsleaktest.com — Focused specifically on DNS leak testing. The “Extended test” option provides thorough results by running multiple queries over a longer period.
- browserleaks.com/webrtc — A dedicated WebRTC leak test that provides detailed information about what your browser is exposing.
- ipv6leak.com — A simple, focused tool specifically for checking whether your IPv6 address is leaking outside the VPN tunnel.
- whatismyipaddress.com — A straightforward tool for quickly checking your visible IP address and approximate geolocation.
All of these tools are completely free, require no downloads or account creation, and work in any web browser. We recommend bookmarking at least ipleak.net and dnsleaktest.com for regular checks.
How Often Should You Check if Your VPN Is Working?
You don’t need to run these tests every time you connect, but there are specific situations where testing is a smart idea:
- After installing or updating your VPN app: Updates can sometimes reset settings, including leak protection features and kill switch configurations.
- After updating your operating system or browser: OS and browser updates can change network settings, WebRTC behavior, or DNS configurations.
- When switching to a new VPN server or location: A quick check confirms the new server is working as expected.
- When connecting from a new network: Different networks (especially public Wi-Fi) can behave differently and may cause leaks that don’t occur on your home network.
- Periodically, as a routine check: Once a month is a reasonable frequency for most users. It takes just a couple of minutes and gives you peace of mind.
What to Do If Your VPN Fails the Tests
If you’ve run through the steps above and found leaks, don’t panic. Here’s a practical troubleshooting checklist:
1. Enable all built-in protection features. Open your VPN app’s settings and ensure DNS leak protection, IPv6 leak protection, and the kill switch are all turned on. These features exist specifically to prevent the issues we’ve discussed, but they’re sometimes disabled by default.
2. Switch VPN protocols. Most VPN apps let you choose from several protocols (such as WireGuard, OpenVPN, or IKEv2). If you’re experiencing leaks on one protocol, try switching to another. WireGuard and OpenVPN tend to be the most reliable options in 2026.
3. Try a different VPN server. The issue might be specific to the server you’re connected to. Switch to a different server in the same country or try a server in another location entirely.
4. Reinstall the VPN app. A corrupted installation or outdated configuration file could be causing the problem. Uninstall the app completely, restart your device, and install the latest version from the provider’s official website.
5. Contact your VPN provider’s support team. If none of the above resolves the issue, reach out to customer support. Share the specific test results (screenshots from ipleak.net or dnsleaktest.com help), and they can guide you through more advanced troubleshooting.
6. Consider switching providers. If your VPN consistently fails leak tests and the provider can’t resolve the issue, it may be time to consider a more reliable option. Providers like NordVPN (supporting up to 10 simultaneous connections), ExpressVPN (up to 14 simultaneous connections on the Pro plan), and Surfshark (unlimited simultaneous connections) are well-regarded for their leak protection in 2026.
A Note About Free VPNs and Testing
If you’re using a free VPN, testing becomes even more important. While there are some legitimate free VPN options available, many free services lack robust leak protection features. They may not include a kill switch, DNS leak protection, or WebRTC blocking. Most free VPNs in 2026 also impose data caps, typically between 2GB and 10GB per month, which limits how much you can use them.
More importantly, some free VPN providers have been found to log user activity or inject ads into browsing sessions — which fundamentally undermines the reason you’re using a VPN in the first place. If your free VPN fails the leak tests described in this article, upgrading to a reputable paid provider is strongly recommended.
What VPN Tests Can’t Tell You
It’s worth being honest about the limitations of these tests. While they’re excellent for detecting IP, DNS, WebRTC, and IPv6 leaks, they can’t verify everything about your VPN’s privacy protections.
- Encryption strength: These tools don’t verify whether your VPN is actually encrypting your traffic or which encryption standard it’s using. You need to trust your VPN provider’s claims or use a packet analysis tool like Wireshark (which is more advanced than most users need).
- Logging policies: No online test can confirm whether your VPN provider is truly keeping no logs. This comes down to the provider’s reputation, independent audits, and transparency reports.
- Server security: You can’t test whether the VPN server itself is secure or compromised. Again, this depends on the provider’s infrastructure and security practices.
This doesn’t diminish the value of the tests we’ve covered. They address the most common and most practically impactful vulnerabilities. But it’s good to keep the bigger picture in mind and choose a VPN provider you trust based on their track record, audit history, and reputation within the privacy community.
Frequently Asked Questions
How do I test if my VPN is working on my phone?
The process is the same as on a desktop. Open your mobile browser, visit ipleak.net before and after connecting to your VPN, and compare the results. The site works well on both Android and iOS devices. Check the IP address, DNS servers, and WebRTC sections just as you would on a computer. If your VPN provider offers a mobile app, make sure features like DNS leak protection and the kill switch are enabled in the app’s settings.
Can my ISP see that I’m using a VPN?
Your ISP can typically detect that you’re using a VPN because it can see encrypted traffic going to a known VPN server IP address. However, it generally cannot see what you’re doing within that encrypted tunnel — meaning it can’t see which websites you visit or what data you transmit. Some VPNs offer obfuscation or stealth modes that disguise VPN traffic to look like regular HTTPS traffic, making it harder for ISPs to identify VPN use.
Why does my IP address still show my real country after connecting to a VPN?
This could indicate a VPN connection failure or a leak. First, make sure the VPN is actually connected (check the app’s status). If it says connected but your IP hasn’t changed, try disconnecting and reconnecting, switching servers, or restarting the app. If the problem persists, your VPN may have an IP leak — follow the troubleshooting steps outlined in this article. Also check whether split tunneling is enabled, as your browser may be configured to bypass the VPN.
Is ipleak.net safe to use?
Yes, ipleak.net is a widely trusted, free tool used by privacy researchers and VPN reviewers globally. It doesn’t require you to download anything or create an account. It simply reads publicly available information about your connection (your IP address, DNS servers, and browser features like WebRTC) and displays it to you. It’s been a standard testing tool in the VPN community for years.
How do I know if my VPN is leaking DNS?
Run a DNS leak test using dnsleaktest.com (click “Extended test” for the best results) or check the DNS section on ipleak.net. If the DNS servers listed belong to your ISP or are located in your actual country rather than the VPN server’s country, you have a DNS leak. Enable DNS leak protection in your VPN app’s settings to fix this. If the option isn’t available, your VPN provider may not support this feature, and you should consider switching to one that does.
Do I need to test my VPN every time I connect?
No, that’s not necessary. Once you’ve confirmed your VPN is working correctly with all leak protection features enabled, it should continue to work reliably. However, it’s a good idea to re-test after software updates (VPN app, operating system, or browser), when connecting from unfamiliar networks, or about once a month as a routine check. If anything about your setup changes, a quick two-minute test gives you confidence that everything is still secure.
Conclusion: A Few Minutes of Testing Goes a Long Way
Learning how to test if your VPN is working isn’t complicated, and it doesn’t require any technical skills. With free tools like ipleak.net and dnsleaktest.com, you can verify your IP address is hidden, your DNS requests are private, and your browser isn’t leaking your identity through WebRTC — all in under five minutes.
The key steps are simple: check your IP address before and after connecting, run a DNS leak test, test for WebRTC leaks, and verify your kill switch works. Make it a habit to run these checks after updates and on new networks, and you’ll have genuine confidence that your VPN is actually protecting you.
If you’re still choosing a VPN provider or wondering whether your current one measures up, take a look at our guide to the best VPN services in 2026 for detailed comparisons of top providers including NordVPN, ExpressVPN, and Surfshark — evaluated on exactly the kind of leak protection and reliability we’ve discussed here.