You’ve just settled into the couch, remote in hand, ready to watch that show everyone’s been talking about — only to discover it’s not available in your region. If you own an Apple TV, you’ve probably hit this wall more than once. The good news is that a VPN can help you bypass geographic restrictions and stream content from libraries around the world. The challenge? Figuring out how to set up a VPN on Apple TV isn’t as straightforward as downloading an app. Apple TV doesn’t support native VPN apps the way your iPhone or Mac does, so you’ll need a workaround. Don’t worry — this guide walks you through every method, step by step, so you can get your VPN running on Apple TV without needing a computer science degree.
Why You Need a VPN for Apple TV
Before we get into the setup process, let’s quickly cover why you’d want an Apple TV VPN in the first place. Understanding the “why” will help you decide which setup method makes the most sense for your situation.
Unlock Geo-Restricted Streaming Content
Streaming services like Netflix, Disney+, Hulu, and BBC iPlayer offer different content libraries depending on your location. A show available on Netflix in the United States might not appear in the UK library, and vice versa. A VPN masks your real IP address and replaces it with one from another country, making the streaming service think you’re located somewhere else.
For example, if you’re traveling abroad and want to access your home streaming library, a VPN for Apple TV lets you connect to a server back home and watch as if you never left. This is one of the most common reasons people set up VPNs on their streaming devices.
Improve Your Online Privacy
When you stream without a VPN, your internet service provider (ISP) can see what you’re watching and when. In some countries, ISPs collect and sell browsing data, or they may throttle (deliberately slow down) your connection when they detect heavy streaming activity. A VPN encrypts your internet traffic — think of it as putting your data inside a sealed envelope — so your ISP can’t monitor or interfere with your streaming.
Avoid ISP Throttling
Have you ever noticed your stream starts in crisp HD, then degrades to a blurry mess during peak hours? That’s often ISP throttling at work. Because a VPN hides what you’re doing online, your ISP can’t selectively slow down your streaming traffic. Many users report smoother, more consistent streaming after setting up a VPN on their home network.
Key Takeaway: Apple TV does not support native VPN apps directly. To use a VPN with your Apple TV, you’ll need to set it up on your router, use Smart DNS, or share a VPN connection from your computer. Each method has pros and cons, which we cover in detail below.
How to Set Up a VPN on Apple TV: Three Proven Methods
Since tvOS (the operating system that runs Apple TV) doesn’t allow you to install VPN apps from the App Store, you need to take an indirect approach. There are three main methods, and the best one for you depends on your technical comfort level and what equipment you have at home.
Here’s a quick comparison before we dive into the step-by-step instructions:
- Method 1: Install a VPN on your router — Protects every device on your network, including Apple TV. Best for long-term use.
- Method 2: Use Smart DNS — Easier to set up, great for unblocking content, but doesn’t encrypt your traffic.
- Method 3: Share a VPN connection from your computer — No special equipment needed, but ties up your computer.
Method 1: Set Up a VPN on Your Router for Apple TV
Installing a VPN directly on your router is the most comprehensive approach to getting a VPN for Apple TV. Once configured, every device that connects to your Wi-Fi — your Apple TV, smart speakers, game consoles, phones — automatically uses the VPN. You don’t need to think about it again.
What You’ll Need
- A router that supports VPN client software (many Asus, Netgear, and Linksys models do)
- A VPN subscription from a provider that supports router installation
- Access to your router’s admin panel (usually through a web browser)
- About 15-30 minutes for the initial setup
Step-by-Step Router VPN Setup
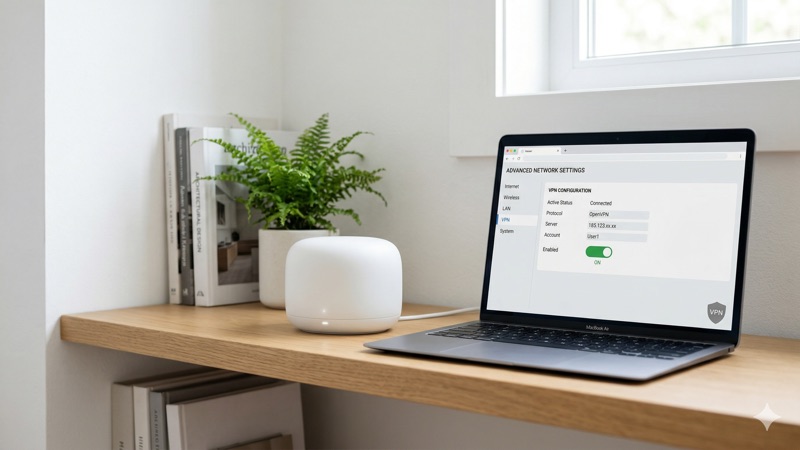
Step 1: Check router compatibility. Log in to your router’s admin panel by typing its IP address into your browser’s address bar. Common addresses are 192.168.1.1 or 192.168.0.1. Look for a “VPN” or “VPN Client” section in the settings. If you don’t see one, your router may not support VPN connections natively, and you may need to flash custom firmware like DD-WRT or OpenWrt — though this is an advanced step that can void your warranty.
Step 2: Get your VPN configuration files. Log in to your VPN provider’s website and navigate to the manual setup or router setup section. Download the OpenVPN configuration files for the server location you want to use. Most providers like NordVPN, ExpressVPN, and Surfshark provide detailed guides and downloadable config files specifically for router setups.
Step 3: Enter VPN details in your router. In your router’s VPN Client section, upload the configuration file you downloaded. Enter your VPN username and password. These credentials are sometimes different from your regular account login — check your VPN provider’s dashboard for “service credentials” or “manual setup credentials.”
Step 4: Connect and verify. Save the settings and activate the VPN connection on your router. The router should show a “Connected” status. To verify it’s working, go to a site like whatismyipaddress.com on any device connected to your Wi-Fi and confirm that your IP address matches the VPN server location you selected.
Step 5: Connect your Apple TV. Simply make sure your Apple TV is connected to the same Wi-Fi network as your VPN-enabled router. No additional configuration is needed on the Apple TV itself. Open a streaming app and check if you can access content from the region you connected to.
Pros and Cons of the Router Method
- Pros: Protects all devices automatically; set-and-forget solution; full encryption for your entire network
- Cons: Initial setup can be intimidating; switching server locations requires logging back into the router; may slightly reduce overall network speed; not all routers are compatible
Pro Tip: Some VPN providers sell pre-configured routers or offer dedicated router apps that make switching servers much easier. ExpressVPN, for example, offers its Aircove router with built-in VPN support, letting you change server locations from a simple app interface instead of digging through router settings.
Method 2: Use Smart DNS on Apple TV
If configuring a router feels too technical, Smart DNS is a simpler alternative. Smart DNS reroutes only the portion of your traffic that reveals your location, allowing you to access geo-restricted content without the full overhead of VPN encryption. It’s faster than a VPN because it doesn’t encrypt your data, but that also means it doesn’t offer the same privacy protection.
Most major VPN providers include Smart DNS as part of their subscription at no extra cost. NordVPN calls it SmartPlay, ExpressVPN offers MediaStreamer, and Surfshark includes Smart DNS in all plans.
Step-by-Step Smart DNS Setup on Apple TV
Step 1: Get your Smart DNS addresses. Log in to your VPN provider’s website or app. Look for a Smart DNS or MediaStreamer section. You’ll find one or two DNS server addresses (they look like IP addresses, such as 103.86.96.100). Some providers require you to register your home IP address first so their system recognizes your connection.
Step 2: Open Apple TV settings. On your Apple TV, go to Settings > Network. Select your active connection (Wi-Fi or Ethernet). Choose Configure DNS and switch it from “Automatic” to “Manual.”
Step 3: Enter the DNS addresses. Type in the Smart DNS address provided by your VPN service. If your provider gave you two addresses, enter the primary one here. Save your settings.
Step 4: Restart your Apple TV. Go to Settings > System > Restart to ensure the new DNS settings take effect. This step is important — some users skip it and wonder why things aren’t working.
Step 5: Test your setup. Open a streaming app and try accessing content from a different region. If Smart DNS is working correctly, you should see content that wasn’t available before.
Pros and Cons of Smart DNS
- Pros: Very easy to set up directly on Apple TV; no additional hardware needed; faster than VPN since there’s no encryption overhead; doesn’t affect non-streaming traffic
- Cons: No encryption or privacy protection; doesn’t hide your IP address from websites; may not work with all streaming services; limited server location options compared to a full VPN
Method 3: Share a VPN Connection from Your Computer
If you don’t have a VPN-compatible router and Smart DNS isn’t meeting your needs, you can share your computer’s VPN connection with your Apple TV. This works by turning your Mac or Windows PC into a virtual router.
Sharing a VPN Connection from a Mac
Step 1: Connect your Mac to the internet via Wi-Fi. Connect your Apple TV to your Mac using an Ethernet cable (you may need a USB-C to Ethernet adapter for newer MacBooks).
Step 2: Activate your VPN on your Mac using your VPN provider’s app. Connect to the server location you want your Apple TV to use.
Step 3: Go to System Settings > General > Sharing on your Mac. Enable “Internet Sharing.” Share your connection from your VPN adapter to devices connected via Ethernet.
Step 4: On your Apple TV, go to Settings > Network and select the Ethernet connection. Your Apple TV should now be routing its traffic through your Mac’s VPN connection.
Sharing a VPN Connection from Windows
Step 1: Connect your Windows PC to Wi-Fi and connect your Apple TV via Ethernet cable.
Step 2: Activate your VPN app on Windows and connect to your desired server.
Step 3: Open Settings > Network & Internet > Mobile hotspot or go to Network Connections in Control Panel. Right-click your VPN adapter, select Properties, go to the Sharing tab, and check “Allow other network users to connect through this computer’s internet connection.” Select your Ethernet connection from the dropdown.
Step 4: On your Apple TV, switch to the Ethernet connection. Verify by checking your IP address through a streaming app or browser.
Pros and Cons of Connection Sharing
- Pros: No router configuration needed; full VPN encryption; easy to switch server locations via the VPN app on your computer
- Cons: Requires your computer to be on and connected at all times; needs an Ethernet cable and possibly adapters; can be slightly finicky to set up; ties up your computer’s connection
Best VPNs for Apple TV in 2026
Not every VPN works well for streaming on Apple TV. You need one that’s fast enough for HD and 4K video, reliable at unblocking streaming services, and ideally offers router support or Smart DNS. Here are three providers that consistently perform well for Apple TV VPN setup.
NordVPN
NordVPN is one of the most popular choices for streaming on Apple TV. It includes SmartPlay technology, which combines VPN and Smart DNS features automatically. It supports up to 10 simultaneous connections, meaning your Apple TV, phones, laptops, and tablets can all be protected at once. NordVPN provides detailed router setup guides for many router models and offers consistently fast speeds across its 6,000+ server network.
ExpressVPN
ExpressVPN stands out for its dedicated router app and the Aircove router, which makes the router VPN method far less intimidating. Its MediaStreamer Smart DNS feature is straightforward to configure on Apple TV. The Pro plan supports up to 14 simultaneous connections. ExpressVPN is widely regarded as one of the most reliable VPNs for unblocking streaming platforms, and its server network covers 105+ countries.
Surfshark
If you have a large household with many devices, Surfshark is hard to beat because it offers unlimited simultaneous connections. That means every device in your home can use the VPN without any restrictions. Surfshark includes Smart DNS in all its plans and provides easy-to-follow router setup guides. It’s also one of the more affordable premium VPN options, making it a great value pick for Apple TV users.
A Note on Free VPNs: You might be tempted to use a free VPN for Apple TV, but most free VPNs offer only 2GB to 10GB of data per month as of 2026. A single HD movie can use 3-5GB, and 4K streaming can burn through 7GB per hour. Free VPNs also tend to have slower speeds, fewer server locations, and may collect and sell your data to third parties. For streaming on Apple TV, a paid VPN is a far better experience.
Troubleshooting Common Apple TV VPN Issues
Even with careful setup, you might run into a few hiccups. Here are the most common problems and how to fix them.
Streaming Service Still Detects Your Location
Some streaming services have become quite good at detecting VPN and Smart DNS usage. If you’re connected but still seeing your local content library, try these steps: switch to a different server in the same country, clear the streaming app’s cache by force-closing and reopening it, or restart your Apple TV entirely. If you’re using Smart DNS, make sure your home IP address is registered with your VPN provider — many require you to update this when your ISP changes your IP.
Slow Streaming Speeds
If your video is buffering or stuck in low resolution, the issue is usually the distance between you and the VPN server, or server congestion. Connect to a server geographically closer to you (or closer to the streaming service’s servers). If your VPN app offers protocol options, try switching to WireGuard, which is generally the fastest modern VPN protocol. Also check that your base internet speed is fast enough — a VPN can’t make your connection faster than what your ISP provides.
VPN Disconnects on Router
If your router VPN connection drops intermittently, check whether your router’s firmware is up to date. Older firmware can have bugs that affect VPN stability. You should also make sure you’re using the latest configuration files from your VPN provider, as they update their servers periodically. Some routers have a “Keep Alive” or “Auto Reconnect” option in the VPN settings — enable this to have the router automatically reconnect if the VPN drops.
DNS Leaks
A DNS leak happens when your device sends web requests outside the VPN tunnel, potentially exposing your real location. This is more common with the router method if DNS settings aren’t configured correctly. To check, visit a DNS leak test website from a device on the same network. If you see your real ISP’s DNS servers instead of your VPN’s, go back to your router settings and make sure DNS is set to use your VPN provider’s DNS servers rather than your ISP’s.
Which Apple TV VPN Setup Method Should You Choose?
The right method depends on your priorities and technical comfort level. Here’s a simple way to decide:
- Choose the router method if you want full protection for all your devices and don’t mind a one-time setup process. This is the best long-term solution, especially if you have a VPN-compatible router or are willing to invest in one.
- Choose Smart DNS if your primary goal is unblocking streaming content and you want the easiest setup possible. This is perfect if privacy isn’t your main concern and you just want access to more shows and movies.
- Choose connection sharing if you want full VPN protection but don’t have a compatible router. This works well as a temporary solution or if you only use your Apple TV occasionally.
Many users actually combine methods — for example, using Smart DNS for everyday streaming convenience and switching to the router VPN method when they want full privacy protection.
Important Legal Considerations
Using a VPN is legal in most countries, including the United States, United Kingdom, Canada, Australia, and most of Europe. In the UAE, VPN use is legal for all users when used for lawful purposes — the issue is not VPN use itself, but using a VPN to access prohibited content. A few countries, such as China, Russia, and North Korea, restrict or ban VPN usage entirely.
However, laws vary by country and can change, so it’s worth checking the current regulations in your jurisdiction. Additionally, while using a VPN to access different streaming libraries isn’t typically a criminal offense, it may violate the terms of service of some streaming platforms. This could theoretically lead to your account being restricted, though in practice, services usually just block the VPN connection rather than penalizing users.
This guide is for informational purposes. We encourage you to use VPNs responsibly and in compliance with local laws and service agreements.
Frequently Asked Questions About VPN on Apple TV
Can I install a VPN app directly on Apple TV?
No. As of 2026, Apple TV’s tvOS does not support native VPN apps. Unlike iPhones or iPads, you can’t simply download a VPN from the App Store on your Apple TV. You’ll need to use one of the alternative methods described above: installing a VPN on your router, configuring Smart DNS on your Apple TV, or sharing a VPN connection from your computer.
Will a VPN slow down my Apple TV streaming?
A VPN can slightly reduce your internet speed because it encrypts your data and routes it through an additional server. However, with a quality VPN provider and a fast internet connection, the speed reduction is usually minimal — often not noticeable during streaming. If you’re using the Smart DNS method, there’s virtually no speed impact since it doesn’t encrypt your traffic. For the best streaming experience, connect to a VPN server close to your physical location or to the streaming service’s servers.
Does Smart DNS work the same as a VPN on Apple TV?
Not exactly. Smart DNS and VPN serve different purposes, even though both can help you access geo-restricted content. A VPN encrypts all of your internet traffic and hides your IP address, providing both privacy and the ability to bypass location restrictions. Smart DNS only reroutes the parts of your traffic that identify your location — it doesn’t encrypt anything or hide your IP. If your main goal is simply watching content from other regions, Smart DNS is simpler and faster. If you also care about privacy and security, the router VPN method is the better choice.
Which VPN is the best for Apple TV streaming?
NordVPN, ExpressVPN, and Surfshark are all excellent choices for Apple TV. NordVPN offers SmartPlay and supports 10 simultaneous connections. ExpressVPN provides the most user-friendly router experience with its Aircove router and supports up to 14 connections on the Pro plan. Surfshark offers unlimited connections and is the most budget-friendly option. All three include Smart DNS features and provide detailed Apple TV setup guides.
Will a free VPN work with Apple TV?
Technically, some free VPNs could work, but they’re generally a poor choice for streaming on Apple TV. Most free VPNs in 2026 impose data caps of 2GB to 10GB per month, which isn’t enough for regular video streaming. They also tend to have slower servers, fewer location options, and may not reliably unblock streaming services. Some free VPNs also monetize by collecting and selling user data, which undermines the privacy benefits of using a VPN in the first place.
Can I use a VPN on Apple TV to watch live sports from other countries?
Yes, this is one of the most popular uses for a VPN on Apple TV. Sports broadcasting rights are often region-specific, meaning certain games or events may only be available in specific countries. By connecting to a VPN server in the country where the event is being broadcast, you can access the stream on your Apple TV. Keep in mind that some sports streaming platforms actively block VPN connections, so you may need to try different servers or contact your VPN provider’s support for recommended servers.
Conclusion: Get Your Apple TV VPN Set Up Today
Learning how to set up a VPN on Apple TV might seem daunting at first, especially since Apple doesn’t make it as simple as installing an app. But as you’ve seen, there are practical methods for every skill level. The router method gives you the most comprehensive protection for your entire home network. Smart DNS offers the easiest setup for quick access to geo-restricted streaming content. And connection sharing through your computer provides a solid middle ground when you need full encryption without buying new hardware.
Whichever method you choose, a reliable VPN provider makes all the difference. NordVPN, ExpressVPN, and Surfshark all offer solid Apple TV support, fast streaming speeds, and helpful setup guides to walk you through the process. Take 15-30 minutes to set things up, and you’ll unlock a whole new world of streaming content on your Apple TV.
Ready to explore more ways to protect your streaming devices? Check out our guide on the best VPNs for streaming in 2026 to find the perfect provider for your needs.
“`