How to Set Up a VPN on Android: Step-by-Step Guide
Imagine you’re sitting in a coffee shop, connecting to the free Wi-Fi to check your bank account or send a quick work email. It feels convenient, but that open network is a playground for anyone who wants to snoop on your data. Now imagine you could wrap all of that internet traffic in a private, encrypted tunnel that no one else on that network can peek into. That’s exactly what a VPN does — and learning how to set up a VPN on Android is easier than most people think. In this guide, we’ll walk you through every step, from downloading an app to configuring a connection manually, so you can browse with more confidence no matter where you are.
Whether you’re trying to secure your connection on public Wi-Fi, access content while traveling abroad, or simply add a layer of privacy to your everyday browsing, an Android VPN setup takes just a few minutes. By the end of this article, you’ll have a working VPN on your phone — and you’ll understand exactly what it’s doing behind the scenes.
Why You Need a VPN on Your Android Phone
Your Android phone goes everywhere with you. It connects to your home Wi-Fi, your office network, airport hotspots, hotel networks, and cellular data towers throughout the day. Each of those connections is an opportunity for your data to be intercepted, logged, or monitored by third parties — from hackers on the same public network to your internet service provider (ISP).
A VPN, which stands for Virtual Private Network, creates an encrypted tunnel between your device and a remote server. All of your internet traffic passes through that tunnel, so anyone watching your connection sees only scrambled data instead of the websites you visit or the messages you send. It also replaces your real IP address (the unique number that identifies your device online) with the IP address of the VPN server, adding another layer of privacy.
Here are a few common reasons people install a VPN on Android:
- Public Wi-Fi security: Encrypting your connection on open networks at cafés, airports, and hotels.
- Privacy from ISPs and advertisers: Reducing how much of your browsing activity can be tracked and sold.
- Accessing geo-restricted content: Watching streaming services or visiting websites that are only available in certain countries while you travel.
- Bypassing network restrictions: Connecting to services that may be blocked on certain corporate or institutional networks.
That said, a VPN isn’t a magic shield. It won’t protect you from phishing emails, malware you download voluntarily, or poor password habits. Think of it as one important layer in a broader approach to online safety, not a complete solution on its own.
How to Set Up a VPN on Android Using an App (The Easy Way)
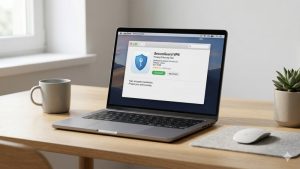
The simplest and most popular method for Android VPN setup is to download a dedicated app from the Google Play Store. This is what we recommend for most people, especially if you’re not comfortable digging into your phone’s network settings. The app handles all the technical configuration for you — encryption protocols, server selection, connection management — behind a clean, tap-friendly interface.
Step 1: Choose a Reputable VPN Provider
Before you download anything, you need to pick a VPN service. There are dozens of options, and quality varies dramatically. Here are three well-known providers that work reliably on Android as of 2026:
- NordVPN: Supports up to 10 simultaneous connections, offers a large server network across 118+ countries, and includes built-in malware protection.
- ExpressVPN: The Pro plan supports up to 14 simultaneous connections on its Pro plan (Basic: 10, Advanced: 12), known for fast speeds and a user-friendly app.
- Surfshark: Offers unlimited simultaneous connections, making it a strong choice for families or anyone with many devices.
All three offer paid subscription plans. While free VPNs exist, most of them impose data caps of around 2GB to 10GB per month, which you can burn through in a single streaming session. Some free VPNs also generate revenue by logging and selling your browsing data — which defeats the entire purpose. If privacy matters to you, a paid service is generally worth the investment.
Step 2: Download the VPN App from Google Play
Open the Google Play Store on your Android phone. In the search bar, type the name of the VPN provider you’ve chosen — for example, “NordVPN” or “Surfshark.” Make sure you’re downloading the official app by checking the developer name. It should match the VPN company’s official name exactly.
Tap Install and wait for the download to finish. The app is typically between 30MB and 80MB, so it won’t take long even on a moderate connection. Once installed, tap Open to launch it.
Step 3: Create an Account or Sign In
If you already have an account with your chosen VPN provider, tap Sign In (or “Log In”) and enter your email and password. If you’re new, you’ll need to create an account first. Most providers let you sign up directly in the app, though some may redirect you to their website to complete the purchase.
During the signup process, you’ll choose a subscription plan. Many VPNs offer monthly, annual, and multi-year options. Longer plans usually come with steeper discounts, but a monthly plan is fine if you want to test the service first.
Step 4: Grant Permissions and Complete Initial Setup
When you first launch the VPN app after signing in, Android will ask you to approve a connection request. You’ll see a system dialog that says something like: “[App Name] wants to set up a VPN connection that allows it to monitor network traffic. Only accept if you trust the source.”
This is a standard Android security prompt. It appears because VPN apps need to create a virtual network interface on your device to route traffic through the encrypted tunnel. Tap OK to allow it. Without this permission, the VPN simply cannot function.
Some apps will also walk you through a brief onboarding tutorial. It’s worth tapping through this — it usually highlights useful features like the kill switch (which cuts your internet if the VPN connection drops unexpectedly) and split tunneling (which lets you choose which apps use the VPN and which don’t).
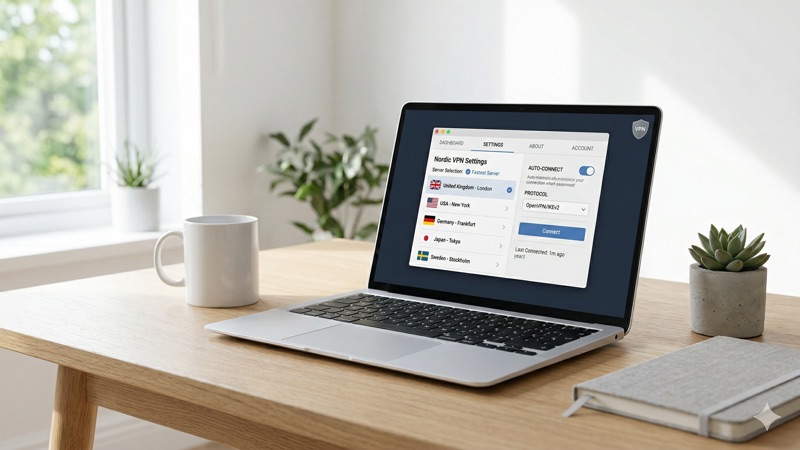
Step 5: Connect to a VPN Server
Now comes the moment everything clicks into place. Most VPN apps display a large Connect button on the main screen. Tapping it will automatically connect you to the fastest or nearest server. This is the best option for everyday use because it minimizes the speed impact on your connection.
If you want to connect to a specific country — say, to access a streaming library that’s only available in the United States while you’re traveling in Europe — look for a server list or a map view. Tap on the country you want, and the app will connect you to a server there.
Once connected, you’ll usually see a small key icon in your Android status bar (the bar at the very top of your screen). This confirms that a VPN connection is active. You can now browse, stream, and use apps as you normally would — your traffic is encrypted.
1. Choose a reputable VPN provider (NordVPN, ExpressVPN, Surfshark, etc.).
2. Download the official app from the Google Play Store.
3. Create an account or sign in with existing credentials.
4. Grant the VPN permission when Android prompts you.
5. Tap Connect — you’re protected. Select a specific country server if needed.
How to Set Up a VPN on Android Manually (Without an App)
While app-based setup is the most convenient route, there are situations where you might need — or prefer — to configure a VPN connection directly in your Android settings. Maybe your workplace provides VPN credentials for accessing internal resources, or you run your own VPN server at home. Perhaps you’re using a provider that doesn’t have a dedicated Android app, or you simply prefer having full control over the configuration.
Android has built-in support for several VPN protocols. The manual VPN configuration on Android process is a bit more involved, but it’s completely doable if you follow the steps below.
What You’ll Need Before You Start
Before diving into settings, gather the following information from your VPN provider or network administrator:
- Server address: This is the hostname or IP address of the VPN server you want to connect to (e.g., us-east.vpnprovider.com or 203.0.113.50).
- VPN protocol: The type of VPN connection. Android natively supports IKEv2/IPSec, L2TP/IPSec, and PPTP. (Note: PPTP is outdated and insecure — avoid it unless there’s no alternative.)
- Username and password: Your login credentials for the VPN service.
- Pre-shared key or certificate: Depending on the protocol, you may need an IPSec pre-shared key (a kind of shared password) or a digital certificate file.
Most VPN providers list these details in the “Manual Setup” or “Router/Other Devices” section of their website or help center.
Step-by-Step: Manual Android VPN Setup via Settings
Step 1: Open the Settings app on your Android phone.
Step 2: Navigate to Network & Internet (on some Android versions or manufacturer skins, this might be labeled “Connections” or “Wi-Fi & Network”). Then tap VPN. If you don’t see a VPN option directly, look for More connection settings or Advanced within the network menu.
Step 3: Tap the + (plus) icon in the top-right corner to add a new VPN profile.
Step 4: Fill in the VPN details:
- Name: Give the connection a recognizable name (e.g., “Work VPN” or “My VPN – US Server”).
- Type: Select the VPN protocol from the dropdown menu. If your provider supports it, choose IKEv2/IPSec PSK or L2TP/IPSec PSK. PSK stands for Pre-Shared Key.
- Server address: Enter the server hostname or IP address your provider gave you.
- IPSec pre-shared key: Enter the pre-shared key if required by your chosen protocol.
- Username: Your VPN account username.
- Password: Your VPN account password.
Step 5: Tap Save.
Step 6: You’ll now see the new VPN profile listed in your VPN settings. Tap on it, and then tap Connect. If the credentials are correct and the server is reachable, you should see a “Connected” status within a few seconds, along with the key icon in your status bar.
Optional: Enable “Always-On VPN”
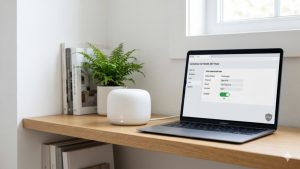
Android offers a useful feature called Always-On VPN. When enabled, your phone will automatically reconnect to the VPN whenever you lose the connection, and it can optionally block all internet traffic that doesn’t go through the VPN (similar to a kill switch).
To enable it, go to Settings > Network & Internet > VPN, tap the gear icon next to your VPN profile, and toggle on Always-on VPN. If you also want to block non-VPN traffic, toggle on Block connections without VPN. This is especially useful if you’re using the VPN for security on untrusted networks.
Using OpenVPN or WireGuard on Android
If you prefer modern, open-source VPN protocols like OpenVPN or WireGuard, you’ll need to download a separate client app because Android’s built-in VPN settings don’t support these protocols natively.
For OpenVPN, download the OpenVPN Connect app from Google Play. Your VPN provider will supply a .ovpn configuration file. Import it into the app, enter your credentials, and connect. For WireGuard, download the WireGuard app from Google Play and import the configuration file (usually a .conf file or a QR code provided by your VPN service).
WireGuard has become increasingly popular because it’s lightweight, fast, and uses modern cryptographic methods. Many VPN providers — including NordVPN (which uses it as the basis of their NordLynx protocol) and Surfshark — now support WireGuard connections on Android.
Configuring Your VPN for the Best Experience on Android
Once your VPN is up and running, a few quick tweaks can make a noticeable difference in performance and usability.
Choose the Right Server Location
The physical distance between you and the VPN server affects your speed. If you just want privacy and security for everyday browsing, connect to a server in your own country or the nearest available location. You’ll get the fastest speeds this way because your data has less distance to travel.
If you need an IP address in a specific country — for example, to access a streaming service’s library while abroad — then select a server in that country. Just be aware that the farther the server, the higher your latency (the delay before data starts transferring), which can affect video calls and online gaming.
Enable the Kill Switch
A kill switch is a feature that immediately cuts your internet connection if the VPN drops unexpectedly. Without it, your phone would silently revert to your regular, unencrypted connection, potentially exposing your real IP address and browsing activity without you realizing it.
Most major VPN apps have a kill switch option in their settings menu. If you configured your VPN manually through Android’s built-in settings, the “Block connections without VPN” toggle (mentioned earlier) serves the same purpose.
Use Split Tunneling Where It Makes Sense
Split tunneling lets you decide which apps route their traffic through the VPN and which ones use your regular connection. This is handy when you want the VPN for your web browser and email but don’t need it for a local food delivery app or a fitness tracker that only works in your region.
Look for this feature in your VPN app’s settings. It’s usually called “Split Tunneling,” “App-Based Routing,” or something similar. NordVPN, ExpressVPN, and Surfshark all offer split tunneling in their Android apps.
Keep Your VPN App Updated
VPN apps receive regular updates that patch security vulnerabilities, improve performance, and add new servers. Make sure automatic updates are enabled in the Google Play Store, or check for updates manually every few weeks. Running an outdated VPN app can leave you exposed to known security flaws.
Troubleshooting Common Android VPN Issues
Most of the time, VPN connections on Android work smoothly. But when something goes wrong, here are the most common issues and how to fix them.
The VPN Won’t Connect
This is the most frequent complaint. Start with the basics: make sure your underlying internet connection is working by opening a website without the VPN. If your regular internet is fine, try switching to a different VPN server — the one you’re trying to reach might be temporarily overloaded or undergoing maintenance.
If you set up the VPN manually, double-check every field in your VPN profile. A single typo in the server address or pre-shared key will prevent the connection from being established. Also ensure your subscription is active and hasn’t expired.
Slow Speeds While Connected
Some speed reduction is normal when using a VPN because your data has to travel an extra hop and be encrypted/decrypted. However, if speeds are unusably slow, try these fixes:
- Switch to a closer server. Distance is the most common cause of slow VPN speeds.
- Change the VPN protocol. WireGuard and IKEv2 are generally faster than OpenVPN. Check your app’s settings for a protocol option.
- Restart the VPN connection. Disconnect, wait a few seconds, and reconnect.
- Check your base internet speed. If your connection is slow without the VPN, the VPN can’t make it faster.
Certain Apps or Websites Don’t Work with the VPN On
Some banking apps, streaming services, and government websites actively block VPN connections. If an app or site stops working when your VPN is on, you have a couple of options. First, try connecting to a different server — some servers may not be flagged. Second, use split tunneling to exclude that specific app from the VPN while keeping everything else protected.
Battery Drain
Running a VPN does consume additional battery because your phone is constantly encrypting and decrypting data. The impact varies by protocol — WireGuard is notably more battery-friendly than OpenVPN. If battery life is a concern, use split tunneling to limit which apps go through the VPN, and consider disconnecting when you’re on a trusted network like your home Wi-Fi.
The VPN Keeps Disconnecting
Frequent disconnections are often caused by Android’s battery optimization features, which aggressively put background apps to sleep. Go to Settings > Battery > Battery Optimization (the exact path varies by manufacturer) and set your VPN app to “Not Optimized” or “Unrestricted.” This tells Android to let the VPN run continuously without interference.
On Samsung devices, also check Settings > Battery > Background usage limits and make sure the VPN app is listed under “Never sleeping apps.”
A Quick Note on VPN Legality
In most countries, using a VPN is perfectly legal. This includes the United States, the United Kingdom, Canada, Australia, and most of Europe. In the UAE, VPN use is legal for all users for lawful purposes — the concern is not VPN use itself but using a VPN to access prohibited content.
However, a few countries impose restrictions or outright bans on VPN usage. Laws vary significantly by jurisdiction, and regulations can change. If you’re traveling to or living in a country where you’re unsure about the legality of VPNs, research the local laws before connecting. A VPN does not make illegal activity legal — it’s a privacy tool, not a license to break the law.
Frequently Asked Questions About Android VPN Setup
Is it free to set up a VPN on Android?
The Android operating system has built-in VPN support at no cost, and many VPN provider apps are free to download from the Google Play Store. However, most quality VPN services require a paid subscription. Free VPN options exist, but they typically impose data caps of around 2GB to 10GB per month and may offer fewer servers and slower speeds. Some free VPNs also collect and sell user data, so read the privacy policy carefully before using one.
Will a VPN slow down my Android phone?
A VPN will introduce some speed reduction because your data travels through an additional server and undergoes encryption. For most people, this reduction is minimal — especially if you connect to a nearby server and use a fast protocol like WireGuard. Activities like web browsing, social media, and standard-definition video streaming usually feel the same. You may notice more impact during high-bandwidth tasks like 4K streaming or large file downloads.
Can I use the same VPN subscription on my Android phone and other devices?
Yes. Most VPN providers allow you to use one subscription across multiple devices simultaneously. For example, NordVPN supports up to 10 simultaneous connections, ExpressVPN’s Pro plan supports up to 14, and Surfshark offers unlimited connections. This means you can protect your Android phone, laptop, tablet, and other devices all under one account without paying extra.
What’s the difference between app-based and manual VPN setup on Android?
App-based setup uses a dedicated VPN app that handles all the technical configuration for you. You just sign in and tap Connect. Manual setup involves entering server addresses, choosing protocols, and inputting credentials yourself through Android’s built-in VPN settings. App-based is easier and offers more features (like a kill switch and split tunneling). Manual setup gives you more control and works when you have custom server configurations, such as for a workplace VPN.
Does Android’s built-in VPN setting support all protocols?
No. Android’s native VPN settings support IKEv2/IPSec, L2TP/IPSec, and PPTP. For modern protocols like OpenVPN or WireGuard, you’ll need to download a third-party client app (OpenVPN Connect or the WireGuard app) from the Google Play Store. These third-party apps are free and widely used.
How do I know if my VPN is actually working on Android?
The easiest way is to check for the small key icon in your Android status bar — it appears whenever a VPN connection is active. For a more thorough check, visit a website like “whatismyipaddress.com” in your browser while connected. If the IP address and location shown match the VPN server you selected (and not your actual location), the VPN is working correctly. You can compare this by disconnecting the VPN and visiting the same site to see your real IP address.
Conclusion: Take Control of Your Android Privacy Today
Learning how to set up a VPN on Android is one of the simplest and most impactful steps you can take to protect your online privacy. Whether you use the app-based method for a quick five-minute setup or go the manual route for more granular control, the end result is the same: your internet traffic is encrypted, your IP address is hidden, and you have more control over who sees what you do online.
To recap, the app-based approach is best for most people. Download a trusted VPN from the Google Play Store, sign in, and connect. If you need a manual Android VPN setup for a workplace or custom server, Android’s built-in settings handle IKEv2 and L2TP connections well, while third-party apps cover OpenVPN and WireGuard. Either way, remember to enable the kill switch, connect to nearby servers for the best speed, and keep your app updated.
A VPN isn’t a cure-all for every online threat, but combined with strong passwords, two-factor authentication, and general awareness of phishing scams, it forms a solid foundation for your digital security. Now that your Android phone is covered, you might want to extend that same protection to the rest of your network. Check out our guide on how to set up a VPN on your router to protect every device in your home at once.